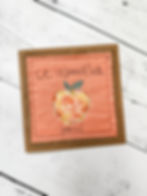
Teacher Appreciation Free-Motion Card
- Ashley Ponder
- May 5, 2024
- 2 min read
Updated: May 15, 2024
Hey, Everyone! Can you believe that we're almost done with the school year? If you're anything like me...you're scrambling around at the last minute to try to find gifts for these wonderful teachers who are so underpaid to deal with so many children! You may be tired of the same old thing, so I thought I would share a new idea! Use this as a starting point and get creative! Use scraps or whatever materials you have on hand.

Free-motion cards are a great way to utilize materials what you have at home and be creative! Don't feel like you have to go by everything unless you plan to make a lot. Below, I'm detailing some of the materials that I use regularly for these...and it makes a lot of cards!
Supplies:
-Scrap pieces of fabric for the peach, leaves, and background
-Free-motion quilting foot
-Coordinating Thread
Directions:
Cut your 12x12 cardstock in half. Fold these two pieces in half, creating (2) 6" x 6" cards. Save one for later.
2. Cut a piece of burlap (or other material) at 5.5" x 5.5". Cut a second material (here I am using orange) at 5" x 5".

3. Draw your peach out on paper in three separate pieces...the peach's body and two separate leaves. I found a simple graphic on the internet and traced it!
4. Using a tracing pad or other light source, such as an open window, place your paper right side down and trace onto the back of your fabric. This keeps your pen marks hidden!
5. Using a sharp pair of detail scissors, cut out your pieces. I like that this method gives the card an 'organic' feel, so I don't feel the need for perfection with this! If you would like things to look more perfect, consider using Heat'n'Bond lite and cutting/fusing onto your card!

6. Install your free-motion foot on your machine and a coordinating thread. On the front of the card, layer the burlap with the orange fabric on top. Free-motion about 1/4" from the sides to create a frame. If you don't feel comfortable doing this, use your regular presser foot and feed dogs here!
7. Free-motion over your peach and sew out your wording. This is the fun part! I do not cut threads until the very end. This is a personal preference but I feel like it saves a lot of time and keeps things neater. I am writing "we a'peach'iate you." Take your time here and have fun!
8. Cut the cross threads and you're finished!

Thank you to our teachers! We couldn't do it without you!


